Padel tactics drills
Padel tactics drills turn a game plan into habits: where you stand as a pair, who takes the middle, which ball you build with and which one you finish with. Below are ten drills in three groups (positioning, building and finishing points, and serve and point plans), each with a court diagram, a pass mark and a progression.
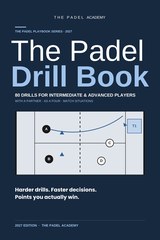
All the drills below are adapted from The Padel Drill Book: Intermediate & Advanced. We have reworded and shortened them for the web; the book has the full versions, with a court diagram for every drill.
How to use these padel tactics drills
Most club players know the tactics in theory. The problem is that the plan disappears as soon as the ball is moving. Tactical drills fix that by scoring the decision, not just the point: you get extra points for doing the right thing and lose them for the wrong one.
- Agree the rules out loud first. Every drill has one tactical idea. Say it before the first ball.
- Play to a score. Most of these are games to 11. That's long enough for the habit to show and short enough to keep the focus.
- Swap roles. Each drill has an attacking and a defending pair. Both learn something.
- Level: Suited to levels 3 to 6 on the 0–7 scale the book uses. The serve formation and pre-point plan drills are for level 5 and up.
For the ideas behind these drills, see our doubles strategy guide and intermediate tactics.
Positioning drills for padel doubles
The base rule of padel positioning is to move as a pair. Padel Browser describes partners linked by an imaginary rope: when one moves, the other follows, and when one covers a wide ball, the other slides over to close the middle. The Padel School puts it the same way: if your partner goes back, you go back.
1. Slide as one wall (N9 in the book)
Players: 3 · Time: 12 min · Level: 3–5
Set-up: Your pair at the net. On the other side, a feeder with a basket walks along the back of the court, stopping at five marked points spread from wall to wall.
How it works: At each stop the feeder holds up the ball before hitting. You both shift: whoever is opposite the ball covers the line, the other leans in to protect the centre. Then comes a drive, the player whose ball it is volleys it deep, and the feeder walks to the next mark. A spare player watches the distance between you before every feed and says if it has grown or shrunk.
The key idea: Picture the two of you carrying a bench. If one end moves a metre, the other end moves a metre too.
Pass mark: On 18 of 20 feeds you are already in the right spots when the feeder strikes.
Make it harder: No more holding up the ball, and lobs are allowed, so you also decide when to retreat.
2. Same depth, same time (P10 in the book)
Players: 3 · Time: 12 min · Level: 3–5
Set-up: Your pair starts in net position. The feeder sends six-ball sequences that mix it up: volleys, a deep lob to drive you back, a short one to draw you in, and balls out wide.
How it works: Each time one of you plays the ball, the feeder shouts "freeze" and you both stop dead. The feeder checks two things. First, depth: is either of you more than a metre in front of the other? Second, direction: have both of you moved towards the side the ball is on? Pass both checks and you score a point.
Pass mark: 30 or more of the 36 freezes pass both checks.
Make it harder: The feeder freezes you only now and then, two or three times a sequence, so you can't get ready for it.
3. Own the middle: the forehand rule (P3 in the book)
Players: 3 · Time: 10 min · Level: 3–5
Set-up: Two right-handers at the net, roughly two and a half metres back. The feeder stands by the far back glass and changes spot between balls. If one of you is left-handed, work out your own default before you start.
How it works: State the rule first. With two right-handers, the left-side player's forehand faces the centre, so balls down the middle (volleys and lobs) belong to them. Then two exceptions: the right-side player takes a middle volley when clearly nearer the net, or when the left-side player has just been dragged wide. The feeder sends 20 balls through the centre. The player who takes each one calls "mine" and the other replies "yours".
Pass mark: 17 of the 20 go to the correct player, and every one is called.
Make it harder: Faster feeds, about two seconds apart, with some balls slightly off the centre.
Watch for: Two rackets going for the same ball, or none. On middle balls the left-side player always makes the first move.
4. Shut the middle after the line (P7 in the book)
Players: 4 · Time: 15 min · Level: 4–6
Set-up: Your pair volleys at the net against a pair at the back. Put a cone on the centre line, in line with you.
How it works: Each rally starts with a medium feed to the right-side player, who volleys it down the line. While that ball is crossing the net, the left-side partner slides across until roughly one racket-length from the cone. From there the rally is open. If the player who slid wins the point with a volley from a middle ball, it scores 2. First to 11, then change sides.
The key read: A ball sent down the line means your partner shuts the centre. A ball sent cross-court means you both stay in the middle.
Pass mark: In a whole game to 11, nothing gets through the gap between you.
Make it harder: The opponents may also lob the partner who slid across, so you have to handle a switch.
Tactical drills for building and finishing points
5. Drive builder: patience on the right (P2 in the book)
Players: 4 · Time: 12 min · Level: 3–5
Set-up: Your pair begins behind the service line against two net players. You are on the right and count each of your shots out loud; your partner is only allowed to lob.
How it works: Your first four shots have to be neutral: a deep lob, a low ball at a net player's feet, or something slow down the centre. Only from shot five can you attack, for example with a firm drive at the body, a pass, or a chiquita followed by moving up. Attack before that and you lose the point. First to 11, then your partner builds from the left.
Watch for: Neutral balls with too much pace. Play them at roughly two-thirds speed and let the depth do the work. The Padel School counts hitting too hard among the three most common tactical errors.
Pass mark: Two errors at most in your first four shots, across a whole game to 11.
Make it harder: Raise the count to seven shots, or let the net pair smash.
6. Set up the revés finisher (P1 in the book)
Players: 4 · Time: 15 min · Level: 4–6
Set-up: Your pair holds the net, one player per side. The opponents defend from their back glass and begin every point by lobbing the right-side player.
How it works: The right-side player's job is to build: deep volleys to the corners and the middle, nothing short and nothing forced. The left-side player's job is to finish. A short lob on the left becomes a víbora into the corner or an x3; anything else is a deep bandeja. Points finished by the left-side overhead are worth 2. First to 11, then swap: the opponents get the net and the same scoring. Our left side vs right side guide explains why pairs split the jobs this way.
Pass mark: Your pair gets to 11 first, and the left-side overhead ends at least 4 of those points.
Make it harder: The defenders may lob anywhere, so the left-side player also has to cover lobs down the middle with an overhead on the forehand side.
7. Split the pair (N5 in the book)
Players: 4 · Time: 14 min · Level: 3–5
Set-up: Your pair at the net, two defenders at the back. Mark a channel two metres wide down the centre of their half.
How it works: The defenders start with a drive and may play anything, overheads included. Your aim is to volley into the channel as often as possible, ideally deep enough to reach their glass right between them. They must call every middle ball. If a middle volley goes untouched, or both of them go for it, you score 2. HEAD's tactical advice recommends the middle against a net pair for the same reason: it causes confusion.
Pass mark: You win the game and at least one volley in three lands in the channel.
Make it harder: The defenders stand closer together, so you must choose between the middle and the side glass.
Watch for: Too little depth. A middle ball that lands halfway lets a defender step in early.
8. Pick a target (P8 in the book)
Players: 4 · Time: 15 min · Level: 4–6
Set-up: A standard 2 v 2 with serves. Before each game your pair secretly picks one opponent to target. Cones along the line of the centre line, beyond the service box, show which half belongs to whom.
How it works: You must play every ball to the target's half. Sending it to the other half costs you the point, with one exception: you get a single free ball per point. Keep it for the moment the target's partner wanders over to help. Winning a point with your free ball is worth 2, and so is any point the target loses with an error.
Good to know: Playing most balls to one opponent is a well-known tactic, sometimes called "the fridge". Total Padel notes it isn't against the rules but can feel unfair in friendly games, and that sending every ball the same way gives the target a rhythm. Change height, pace and depth constantly.
Pass mark: Win at least 3 of 4 games, with 6 or more points from target errors.
Make it harder: No free ball at all: every ball in the point has to go to the target.
Serve and point-planning drills
9. The Australian serve pattern (P5 in the book)
Players: 4 · Time: 15 min · Level: 5–6
Set-up: The server serves from the right half with one foot behind the service line. Instead of starting on the left, the server's partner takes the net on the right half too, shading towards the side wall to stay clear of the serve.
Is it legal? Yes. Under FIP Rule 3, the server's partner can stand anywhere on their own side. But a serve that hits the server's partner is a fault (Rule 7), so check the spot every point. Our guide to player positions has the detail.
How it works: Aim the serve at the middle of the box, near the centre line, so the receiver has no wide angle. Then go diagonally forward into the left half. A cross-court return now meets your partner at the net, and you deal with any return down the line, sending it deep cross-court or over the net player with a lob. After the point, return to your normal sides. Each player serves ten points, switching boxes as in a game.
When to use it: The Padel School notes that most professionals serve from the Australian formation, and recommends it at club level mainly when one player is clearly stronger on one side.
Pass mark: The serving pair wins 6 or more of the 10 points.
Make it harder: Play a full set in which the net player signals the formation, using it on no more than half of your serves.
10. The pre-point plan (P9 in the book)
Players: 4 · Time: 20 min · Level: 5–6
Set-up: Ordinary 2 v 2. Give each plan a one-word name. The serving pair might choose between "Glass" (serve wide into the side glass, then a deep first volley to the centre) and "Body" (serve at the receiver, then volley into their corner). The receivers might choose "Over" (lob the net player, then close) or "Low" (return at the server's feet).
How it works: Before each point both pairs quietly agree their plan, covering three things: the first shot, the follow-up, and which of you takes a lob down the middle. FIP Rule 2 allows a maximum of 20 seconds between points, so the name is enough, and your partner repeats it back. After the point, each pair is honest about whether it played the first two shots as planned. Points: 3 for winning on plan, 1 for winning off plan, 1 for losing on plan, nothing for losing off plan.
Pass mark: Over six games, you stick to the plan on two points out of every three or better.
Make it harder: Add an Australian-formation plan, and score the plans only from 30–30 or deuce.
These 10 drills are adapted from The Padel Drill Book: Intermediate & Advanced. The book has 80 drills, each with its own court diagram, plus two ready-made sessions at the end of every chapter and three eight-week plans for levels 3 to 6. See the book and look inside the first 20 pages.
A 60-minute tactics session
| Minutes | Block | Drill |
|---|---|---|
| 0–8 | Warm-up: rallies, volleys and lobs | Our warm-up |
| 8–20 | Sliding as a pair | 1. Slide as one wall |
| 20–30 | Middle-ball calls | 3. Own the middle |
| 30–45 | Game to 11: closing the middle | 4. Shut the middle after the line |
| 45–60 | Two games with a target | 8. Pick a target |
Common tactical mistakes
- One partner moves, the other doesn't. It opens the diagonal gap that good opponents aim at.
- Nobody owns the middle. Agree a default before you play and call every middle ball.
- Going for winners from building positions. Build with depth until a ball sits up, then finish.
- Being predictable. Even a good plan stops working when every ball is the same.
- Plans that are too long. One word between points is enough. More than that and nobody remembers it once the ball is moving.
Frequently asked questions
What are tactical drills in padel?
Drills that score a decision, not just the shot: where you stand, who takes the middle, when to build and when to finish. They are usually played as games with special scoring, so the right choice is rewarded and the wrong one costs points.
How do you practise positioning in padel doubles?
Use a feeder who moves around the far court while you and your partner slide together, keeping the same spacing. Then add freeze calls to check your depth and that you have both moved towards the ball. Slide as one wall and Same depth, same time do exactly this.
Who should take the ball down the middle in padel?
Usually whoever has their forehand towards the centre: for two right-handers, that is the left-side player. Agree exceptions, such as the closer player taking a middle volley, and always call.
Is the Australian formation legal in padel?
Yes. FIP Rule 3 lets the server's partner stand anywhere on their own side. If the serve hits the server's partner, though, it is a fault.
How long can you take between points to plan?
FIP Rule 2 allows up to 20 seconds between points, so pre-point plans need to be short.